Our Limewash Experience
UPDATE: Here is an updated photo of the house with our new landscaping installed. We still get so many questions and comments on the lime wash process in general, but I have to say that the durability and overall look just gets better with time. The natural wearing process is starting to add some real character to the exterior of the home. We have had to re-wash the floor of the patio a couple times as it does tend to wear much faster than the walls. I have linked all of the tools that we used for the entire process below. Hopefully you can find time this spring to dramatically improve your home or project with lime wash!
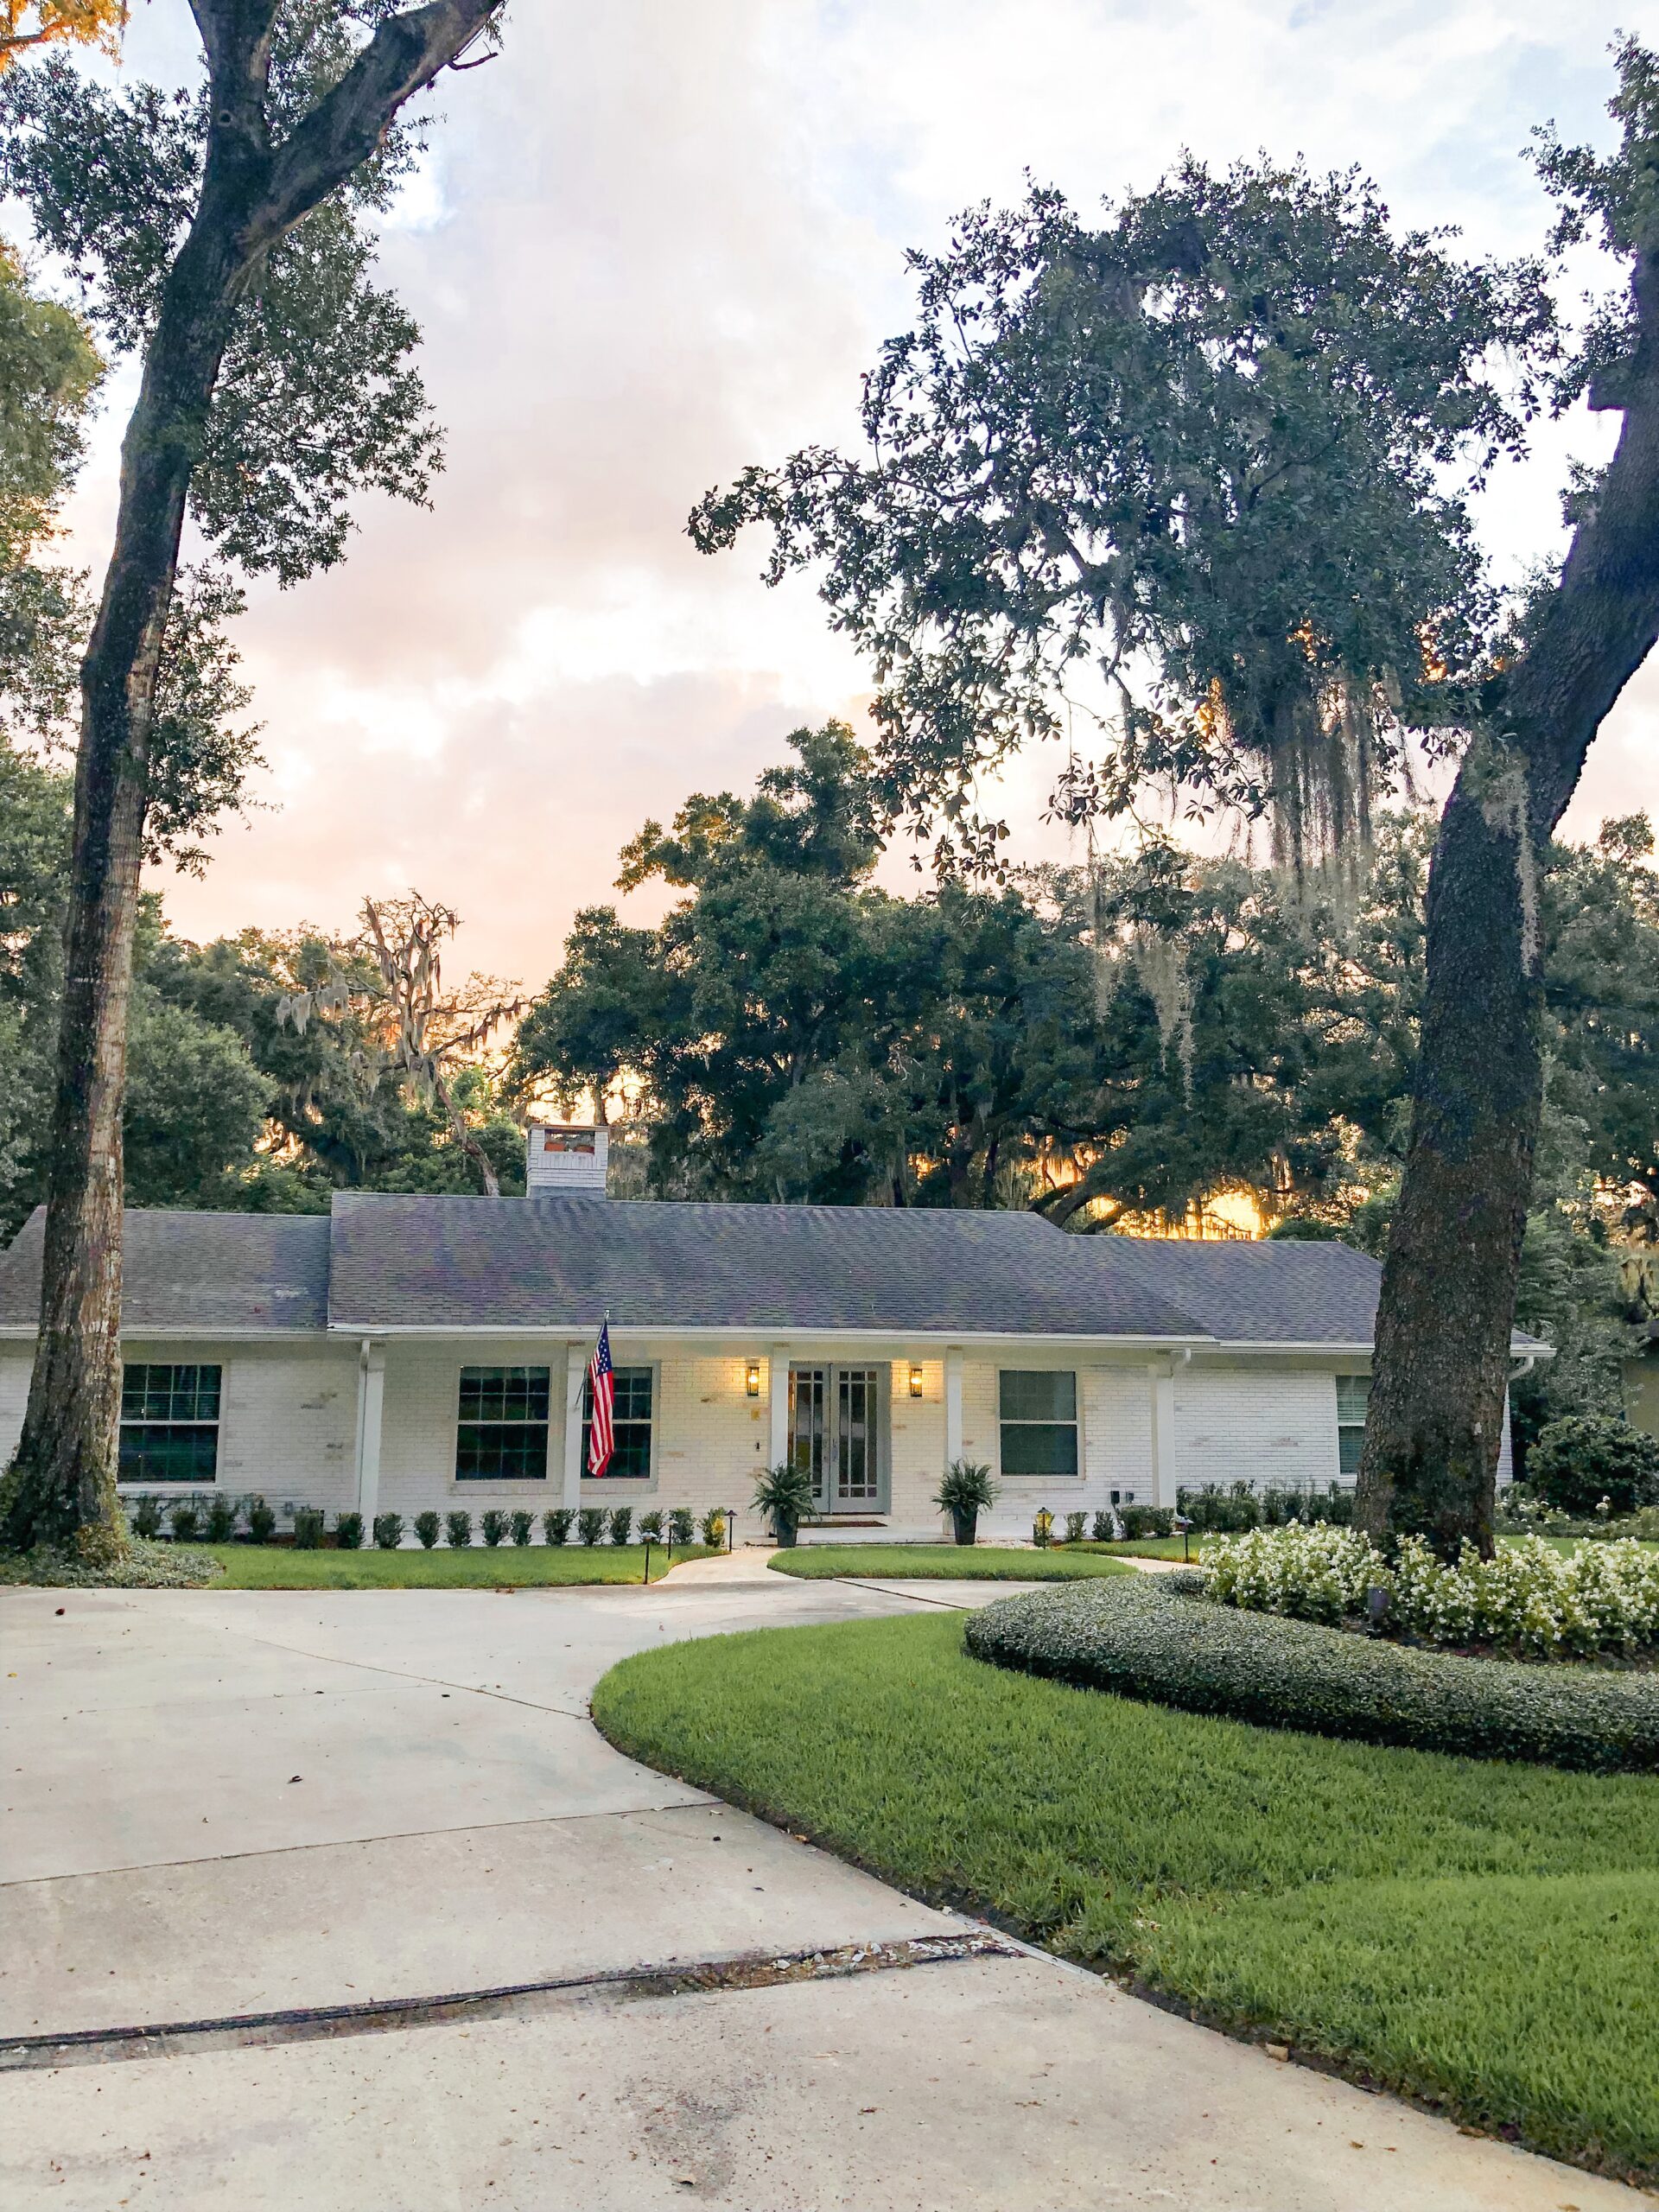
Finally…here is the highly requested blog post all about our experience with lime-washing the exterior of our house. Let me start this post off by saying…
It took us about a week on the actual process of lime-washing and we are still not quite done with the exterior of our home. We still have some work to do with touch-ups, the trim, and finally landscaping (so I’ll share the final photos here in the next few weeks). I have had a ton of people ask for this post because they are considering taking on this project for their home as well; so I didn’t want to make those of you included in that group wait too much longer. The perfectionist in me is definitely cringing about its current state, but hey, this is real life and I’ll embrace it. Here we go…
The number one question was, why did we decide to go with a lime-washing process and not just paint the brick? One reason was that limewash is an all natural, non-toxic, hypoallergenic, environmentally friendly, and breathable product.
It is made up of limestone which is crushed, cooked, slaked and then mixed with water to make a putty that is aged for one year. Then the paint is packed and you are yeady to dilute it with water to create the matte chalk like paint that can be used for interior or exterior. Fun fact, lime is the main ingredient in chalkboard chalk. The second reason we decided to go with lime-wash was the final product. The process can be altered in several different ways to achieve the specific look you are looking for.
There are so many different looks/outcomes when it comes to limewash, but when we were researching and deciding what we wanted, we both gravitated more towards the modern look consisting of mostly all white paint with a little exposure/distressing. I highly recommend the Romabio brand, which can also be found at Home Depot. What we learned is that lime-washing the exterior of a brick home is becoming super popular and when we went to go buy our lime wash at Home Depot, he was just stocking it for the first time in our local store. You can call around to verify that your location has it in stock,or use Romabio Store Locator from their website.
The Process:
- Go on Pinterest or Google Images and search “Limewash Exterior” and see all the different looks. Once you have a look around, find the style you want, screenshot and begin your journey.
- Youtube “limewash how-to’s” and read as much info about it as possible, especially on the manufacture’s website, Romabio. Click Here!
- Schedule a few weekends in a row to get it done, the size of your house will determine how many days it should take. Maybe you are just doing a fireplace, lucky you!
- Call a pressure washing company (we used Ragin Cajun Softwash here in Orlando, its’ our second time and we highly recommend) and schedule them to come out to clean and pressure wash the brick and mortar. Our service provider bleached our house and did an amazing job pressure washing which in turn makes the limewash process more effective. Once completed, we waited until the next day before applying.
- Clear all the dirt and shrubs from around the exterior and base of the house.
- Go to Home Depot and buy your limewash, and the Romabio application brush (a bit pricey but well worth it). One 4 gl. bucket does 1800 sq. ft of surface depending on dilution.
- Test a section/wall with different dilutions and distressing so you can find the process that matches your desired outcome…then get in the groove for the rest of the house.
Things to think about BEFORE deciding to limewash and do it yourself:
- Figure out the type of brick you are working with. We have extruded brick, which means deep, recessed grout lines, so it was a total pain in the a** because we had to go in with a small paint brush to get all those cracks. It just made it a lot harder and took longer.
- Just prepare yourself…it will cost you more than you think, limewash is was more than regular paint (One 4 gallon bucket is $250). We have a ton of brick and ended up needing two four gallon buckets, which we weren’t expecting. It also depends on how opaque you want the paint as well, we wanted more of a solid opaque white look so we didn’t dilute as much.
- Keep in mind temperature has a significant effect on the process, more heat = faster drying. Spring and Fall are more temperate and therefore better suited times of the year to tackle this project.
- Don’t make your significant other do it alone! Get out there and help, lol…teamwork!
By the way… we ended up doing two coats on the front of the house because we wanted it a little bit brighter, we still have the rest of the house to do. (add it to the list).
It was in the beginning of July, in the Florida heat and we had just finished day two, when I said to Brian, “we should have at least got a quote from someone on how much this would have costed. That way we know this work is worth it”. With that being said, if you are attempting to limewash more than 2000 sq. feet you may very well want to at least entertain a professional quote. Having said that, to be totally honest this would have cost us a ton of money if we hired it out, and we ultimately did it for under $1000. It took five full days and we are still not finished but that is okay, we spent a lot of quality time together and are now “experts” in the lime wash department, haha! We are for hire, but consultations only 😉
This is really hard to explain in detail but if you have any questions AT ALL, please DM, e-mail (NotNecessarilyBlonde@gmail.com) and I will answer them!
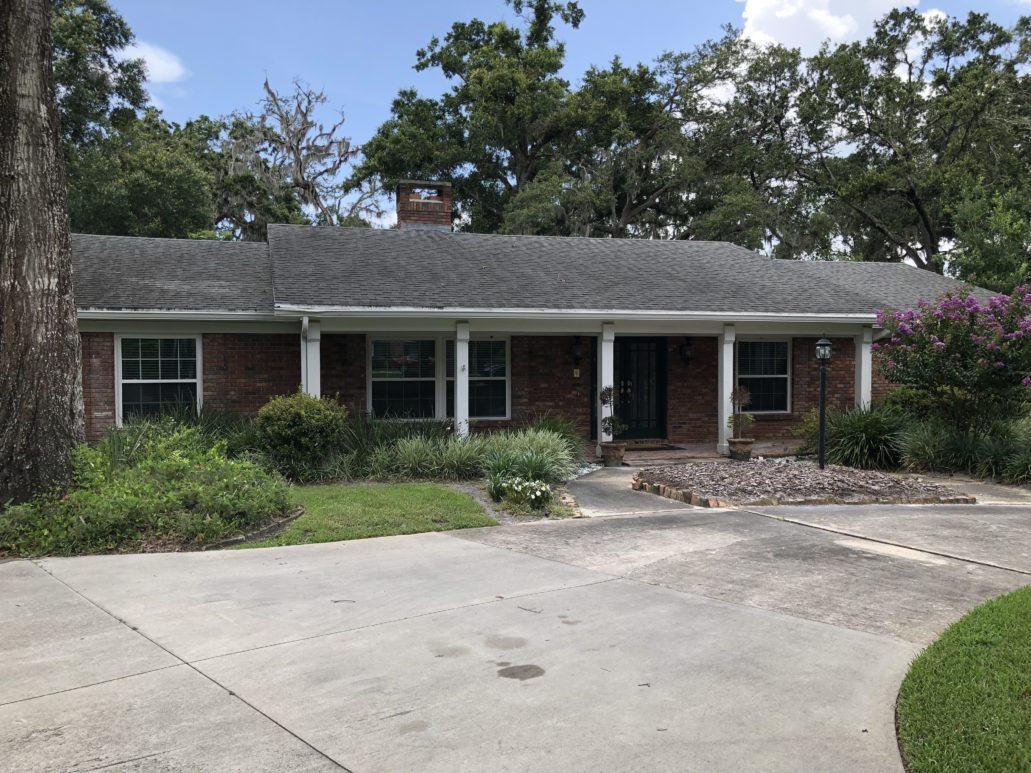
This top photo is before we had the house cleaned, pressure washed and obviously lime wash applied.
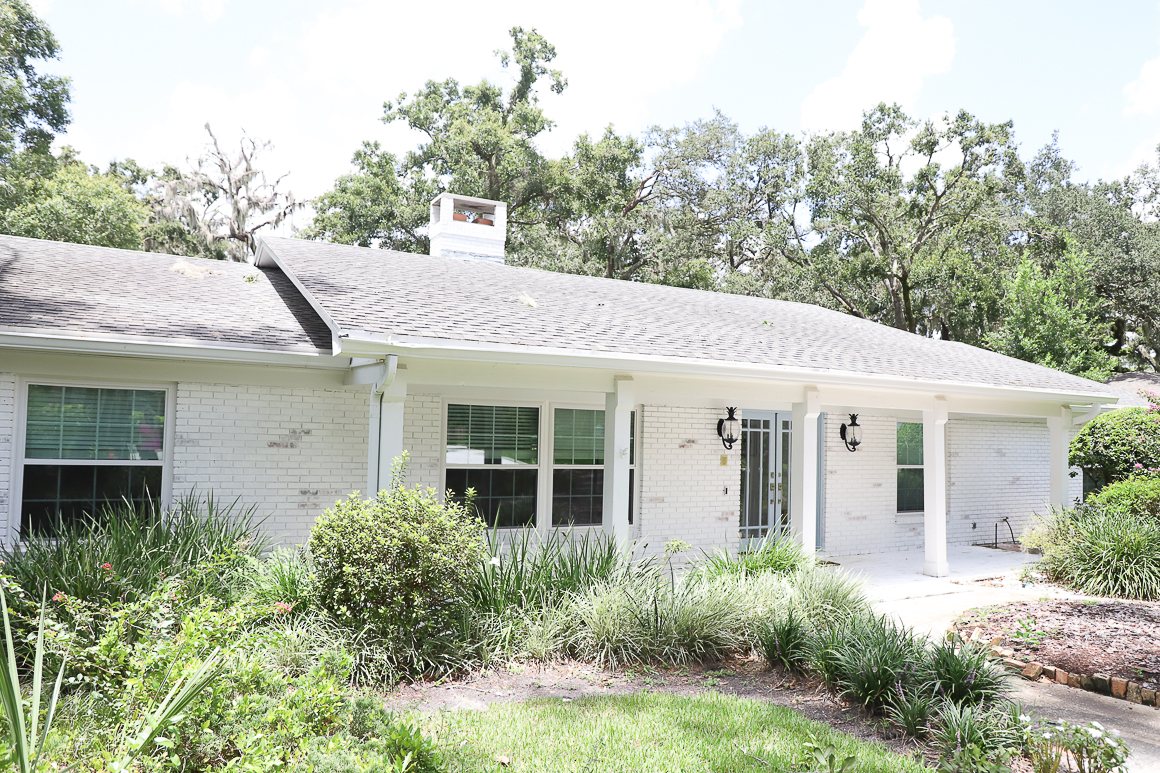
This is a photo of after, which in my opinion totally brightens and modernizes the whole traditional (old school) brick homes. The more you distress the brick the more of an “old world” weathered look you will get.
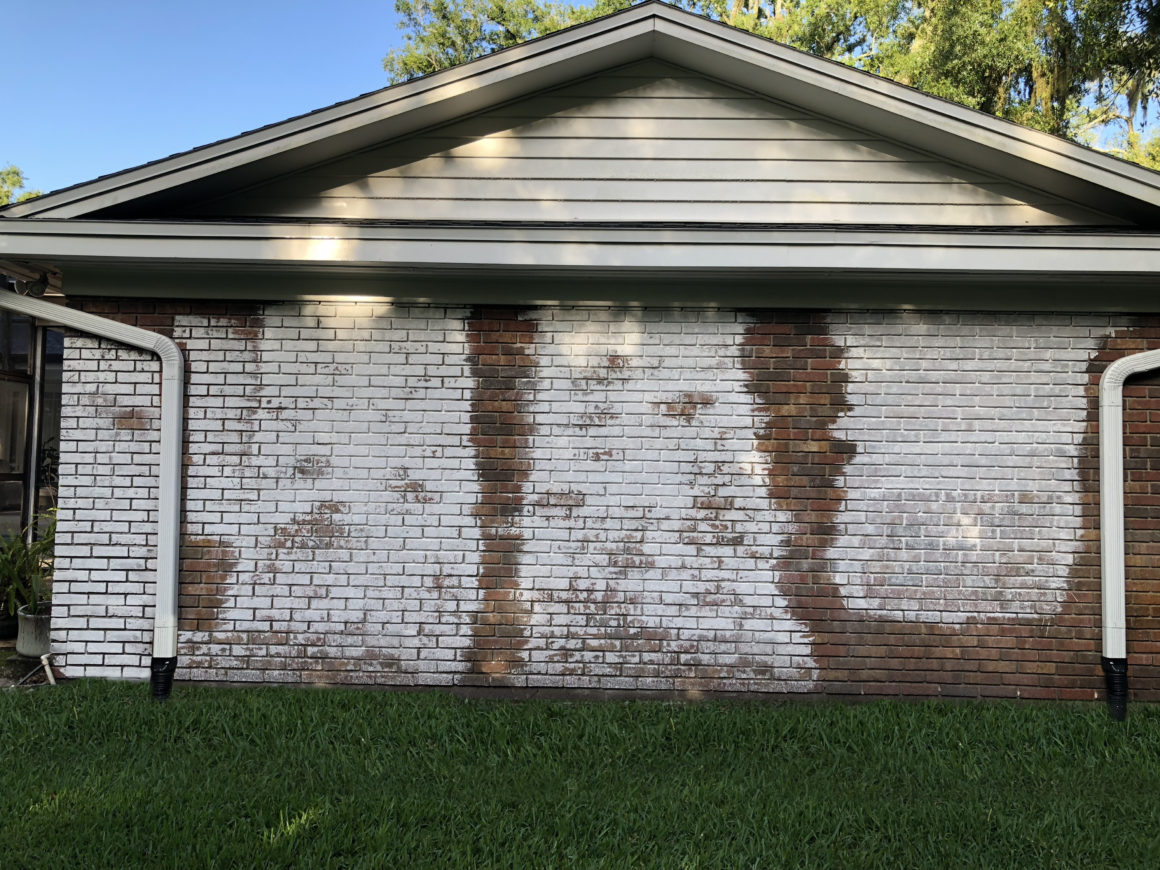
This top photo is where we sampled and tested how we wanted the house whole house to look. I think this was the hardest part but most important. I will break it down here:
Top right is two coats of 150% dilution, with no distressing
Bottom right is one coat of 150% dilution, with no distressing
Middle is one coat at 75% dilution, with a lot of distressing
Left is one coat of 100% dilution, minimal distressing.
Oh, one great thing about limewash, you have up to five days to take it off if you don’t the color or need to touch it up. You just have to pressure washer or use a powerful hose. **Excuse the sand bags that we still haven’t moved from the hurricane… LAST SEPTEMBER!
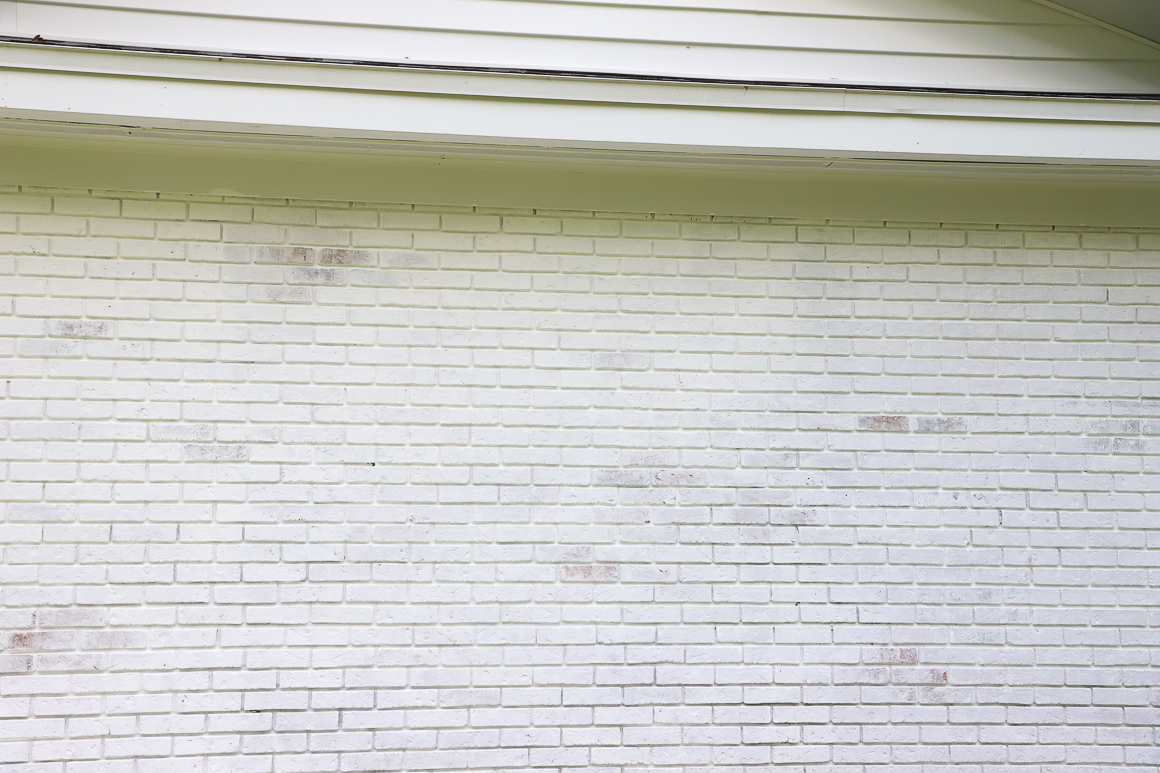
In this after photo (same wall as above) we obviously went back over the full wall with limewash and tested how we wanted to distress it to get the whole look we wanted.
Another pointer: make sure you rinse down the brick right before you apply the lime wash, and then you have to distress about 10 mins after you apply depending on the heat outside.
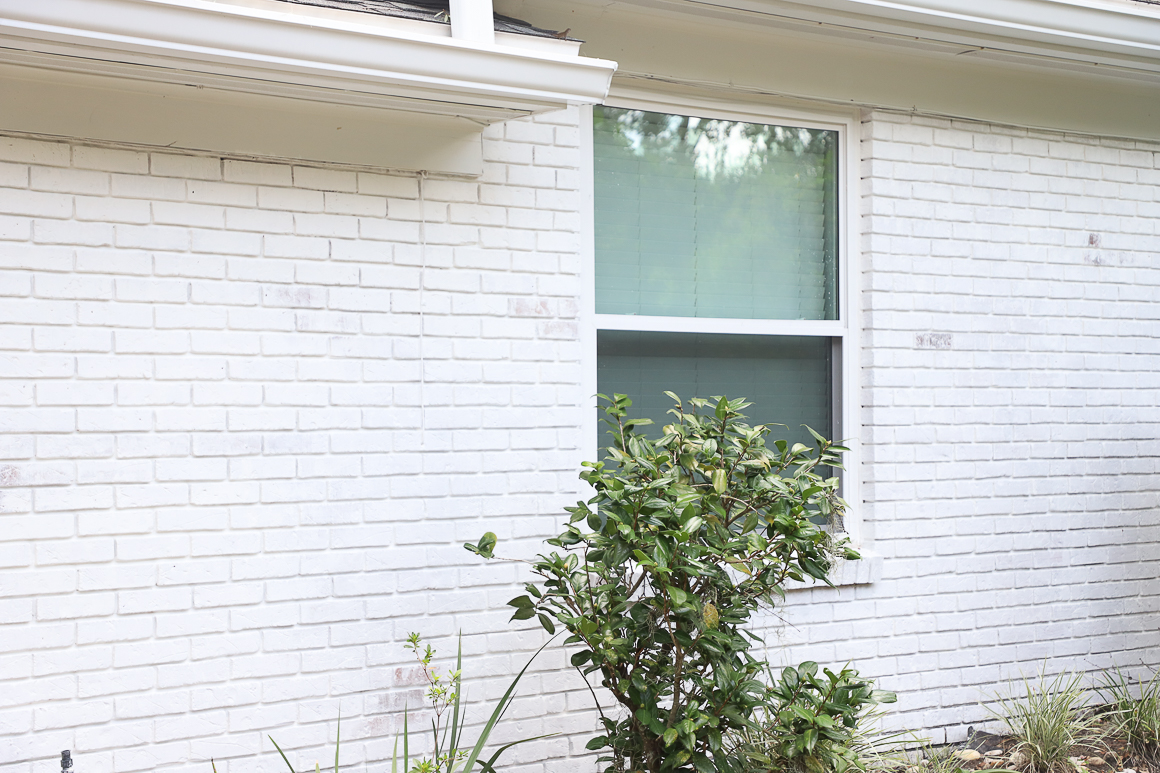
This top photo has two coats of 100% dilution.
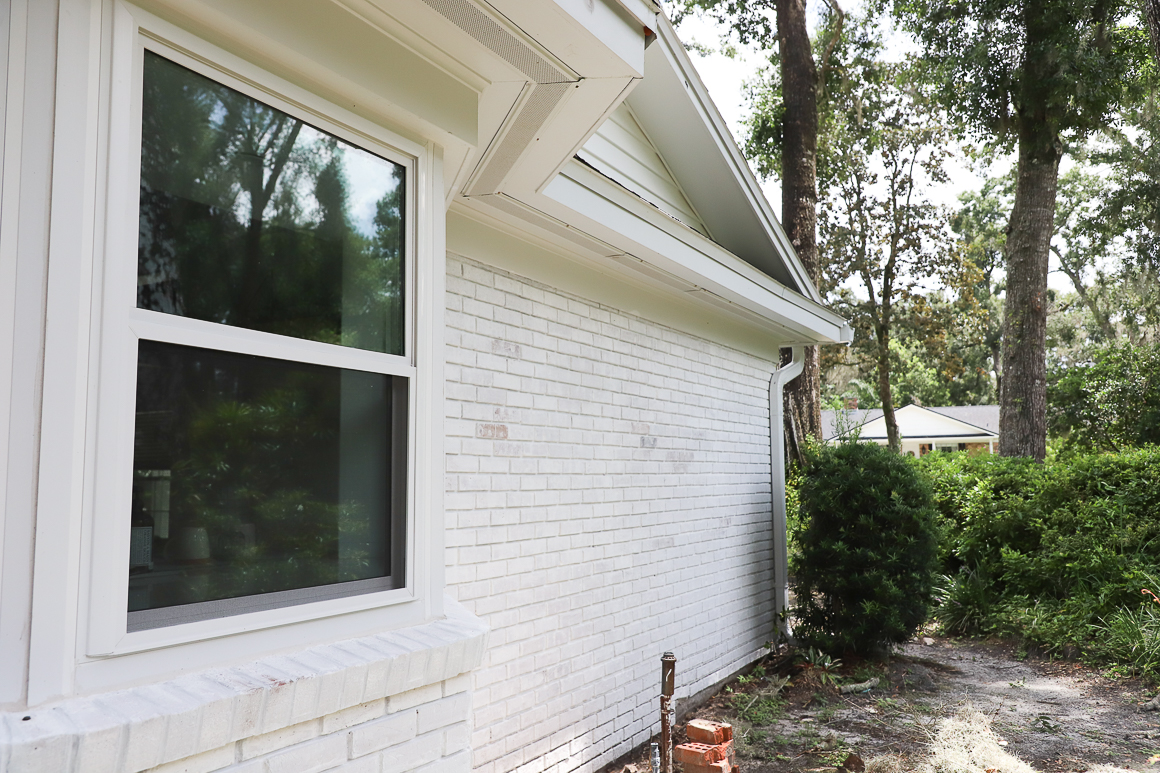
This top photo only has one coat of 100% dilution.
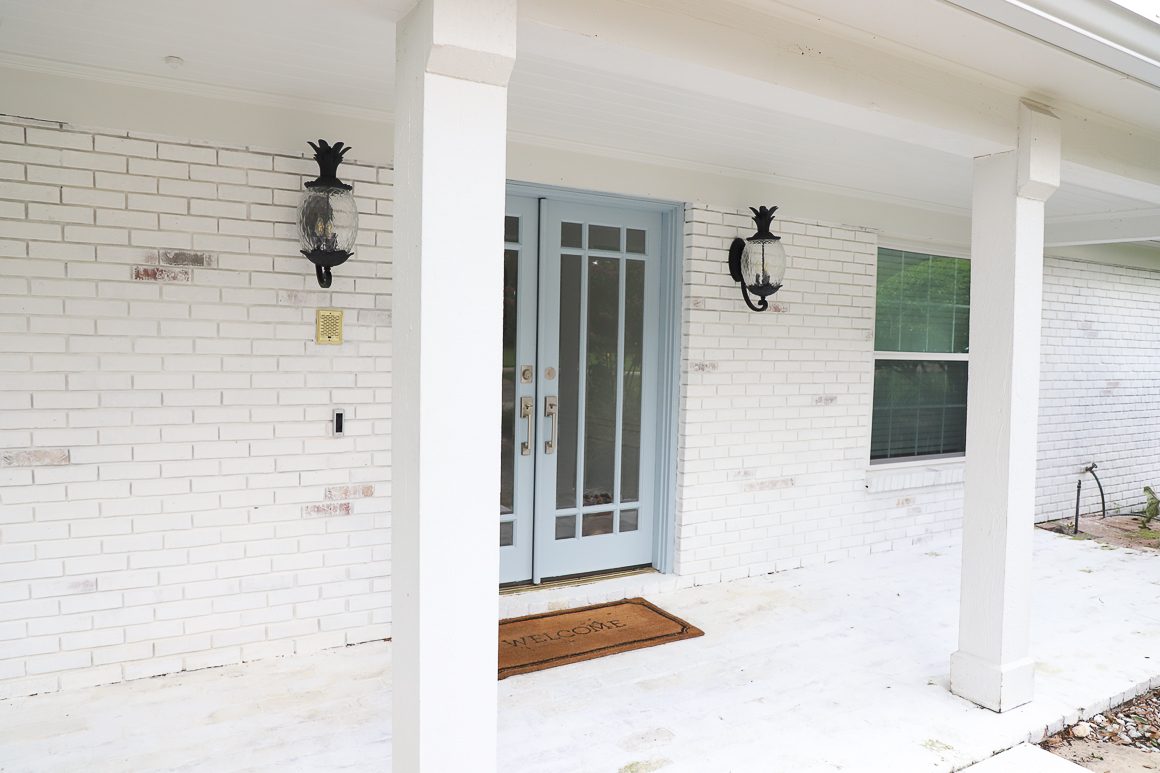
The whole front has two coats of 100% dilution but needs touched up and trim work painted.
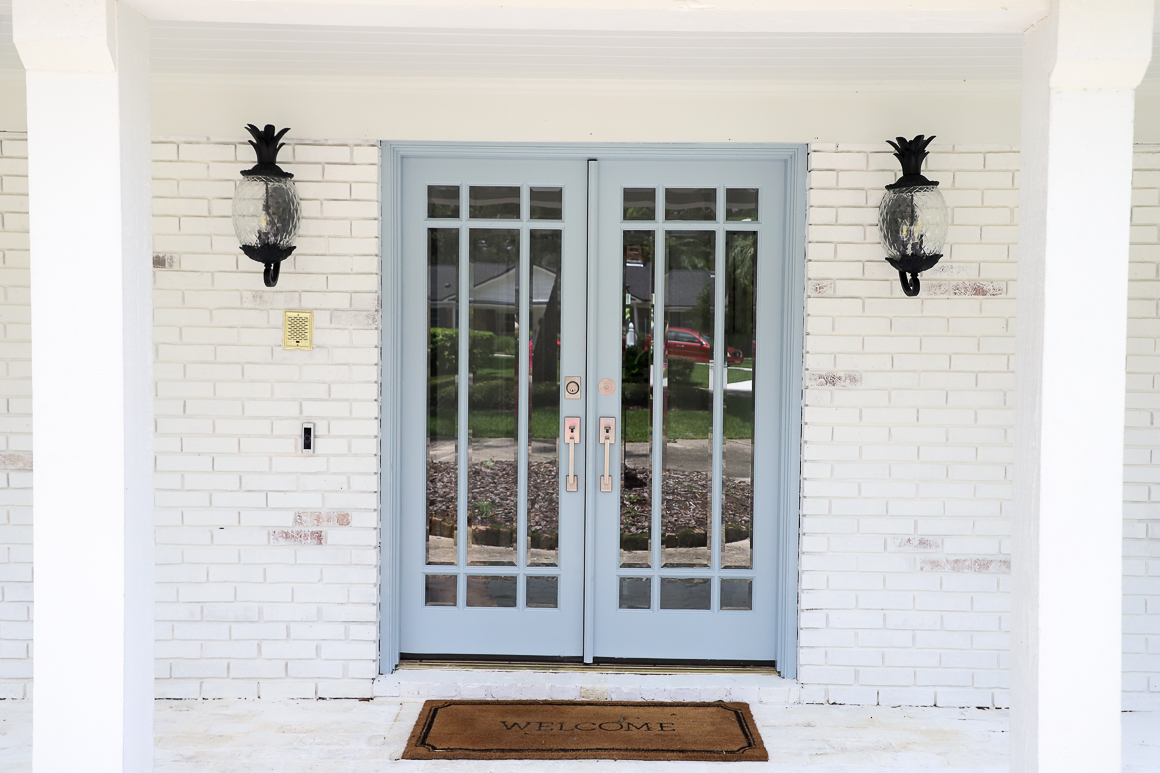
Like I said, I will share the final results of the exterior once we finish all the touchups (in the grout, along the bottom, etc.), paint all the trim and style the front porch. I hope this was helpful and again, if you have ANY questions, please don’t hesitate to contact me.
Xx,
Jocelyn
